
S
Sumit Sarkar
Guest

Sumit Sarkar,Chief Data Evangelist, Progress DataDirect
DataDirect Cloud® provides freedom of choice for developers to access a wide range of data sources from their favorite programming language, such as Python.
It’s exciting to see developers instantly connect to data sources and deliver unique innovation to these business applications. In response, a developer evangelist on my team, Saikrishna Teja Bobba, created the following tutorial to help get more data flowing through open standards and into the developer’s code. This connectivity is available on both Windows and Linux, but the steps are a little different depending on your OS. I’ve split the tutorial into sections based on this, so once you have completed the common steps feel free to skip ahead to the section for your OS.
Getting Started
- If you do not already have a DataDirect Cloud account, register for a free trial before you begin.
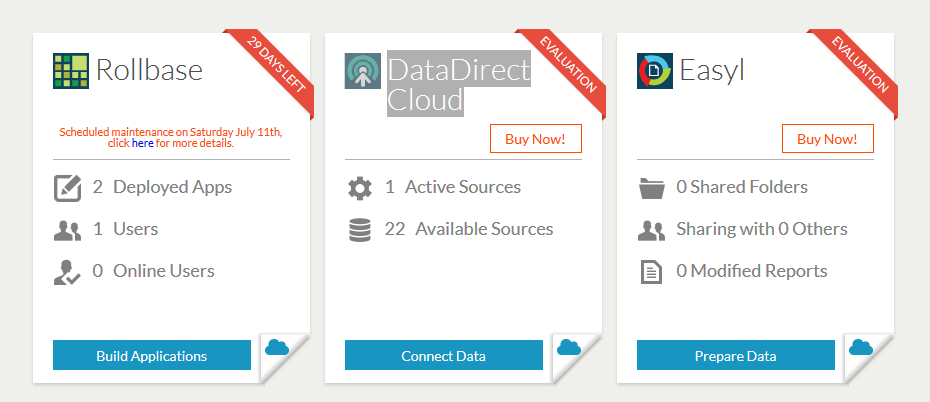
- After registering, log in. You will be taken to the Progress Pacific dashboard. Once there, click “Connect Data” under the DataDirect Cloud section.
Opening the DataDirect Cloud Dashboard
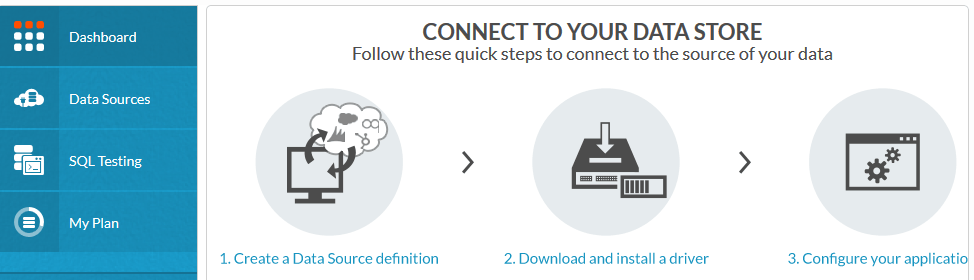
- You will arrive at the DataDirect Cloud dashboard. The first step here is to create a data source definition. Click the “Data Sources” tab on the left side of the screen. On the next screen, click “Data Stores.”
Choose your Data Source
- You will be presented with list of cloud data sources that are currently supported by DataDirect Cloud. For this tutorial I chose Salesforce.com as my cloud data source.
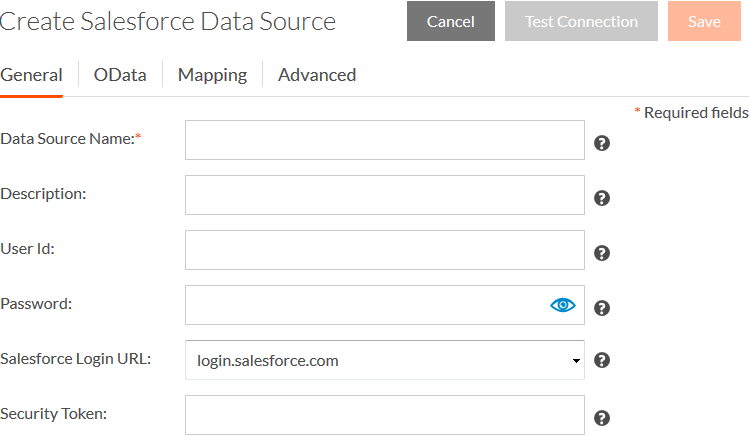
Create a Salesforce Data Source
- Once you select your data source, you will first have to give it a name. This name can be anything you want. You must then provide your Salesforce User ID, password and security token which can be obtained from your account settings in Salesforce.com. Once you have filled in those details, test the connection. If the test is successful, you will be able to save the data source.
- At this point, you can query your cloud data source under the ‘SQL Testing’ tab on the left side of the screen.
- Click the “Downloads” tab on the left side of the screen and download the DataDirect Cloud ODBC driver that matches your OS.
Before going any further, please note that we support the following Linux distributions:
- For 32-bit Drivers:
- Red Hat Enterprise Linux 4.x, 5.x and 6.x
- SUSE Linux Enterprise Server 10.x, 11 and 12
- For 64-bit Drivers:
- Red Hat Enterprise Linux AS, ES and WS version 4.x, 5.x and 6.x
- SUSE Linux Enterprise Server 10.x, 11 and 12
If you are using a supported Linux distribution and have already completed the steps listed in the “Getting Started” section, you can proceed as follows:
- If you have not yet done so, install java using command yum install java.
- Install Python and module pyodbc. For more information on pyodbc and installation, check out this write-up on the project page.
- Navigate to the location of the DataDirect Cloud ODBC driver you downloaded earlier and install it using command:
./PROGRESS_DATADIRECT_CLOUD_ODBC_Version_LINUX_32/64_INSTALL.bin
This will install it in default directory /opt/Progress/DataDirect/Cloud_for_ODBC_20/
- Tip: If you are having trouble with installation, change the permissions of the setup file to execute as a program.
- In the above location you will find a shell script ‘odbc.sh’ for bash and ‘odbc.csh’ for C shell. Run the appropriate script for your shell. This will install a couple of environment variables named ODBCINI pointing to the location of odbc.ini, ODBCINST pointing to the location of odbcinst.ini and LD_LIBRARY_PATH pointing to install_directory/lib. Please make sure that all these environment variables are set by checking them with command env.
- Set another environment variable DD_INSTALLDIR to installation directory. In my case it was /opt/Progress/DataDirect/Cloud_for_ODBC_20/.
- Now open the odbc.ini file and edit the file as follows. Note that ‘MySalesforce’ is the Data Source Name that I have given in DataDirect Cloud Dashboard, so yours might be different.
[ODBC Data Sources]
MySalesforce=DataDirect Cloud 2.0
[ODBC]
IANAAppCodePage=4
InstallDir=/opt/Progress/DataDirect/Cloud_for_ODBC_20
Trace=0
TraceFile=odbctrace.out
TraceDll=/opt/Progress/DataDirect/Cloud_for_ODBC_20/lib/ddtrc27.so
[MySalesforce]
Driver=/opt/Progress/DataDirect/Cloud_for_ODBC_20/lib/ddd2c01.so
Description=DataDirect Cloud 2.0
Database= MySalesforce
LogonID=
ClientTimeZone=
DataSourceUser=
DataSourcePassword=
ProxyHost=
ProxyPort=
ProxyUser=
ProxyPassword=
TransactionMode=0
WSRetryCount=3
WSTimeout=120
LogonDomain=
LoginTimeout=30
QueryTimeout=0
ApplicationUsingThreads=1
ReportCodepageConversionErrors=0
- After making the changes, copy the whole text and open the file /etc/odbc.ini. This file holds all the DSN’s in a Linux machine. Paste the above configuration in the file /etc/odbc.ini and save it.
- To connect to Data Direct Cloud, I have written a python code through which we can fetch and update the data. This works on Windows and Linux. Currently this supports the following actions:
- List all Tables
- Execute SELECT Query
- Execute UPDATE/DELETE Query.
import pyodbc
import getpass
import sys
def show_odbc():
sources = pyodbc.dataSources()
dsns = sources.keys()
sl = []
i = 1
for dsn in dsns:
sl.append( str(i) + '. %s' % (dsn))
i= i+1
print('n'.join(sl))
return dsns
def listTables(cursor):
for row in cursor.tables():
print row.table_name
def executeSelectQuery(cursor, cnxn):
query = raw_input('Enter the SELECT Query:')
cursor.execute(query)
rows = cursor.fetchall()
for row in rows:
print row
def executeUpdateQuery(cursor, cnxn):
query = raw_input('Enter the UPDATE/DELETE Query:')
cursor.execute(query)
cnxn.commit()
print('Update/Delete Successful!')
def connect_odbc(dsn):
print('Select DSN you wish to connect:')
dsn_num = raw_input()
print(str(dsn[int(dsn_num)- 1]))
loginID = raw_input('Enter Data Direct UserName:')
password = getpass.getpass('Enter Data Direct Password:')
print('Attempting to Connect....')
cnxn = pyodbc.connect('DSN='+str(dsn[int(dsn_num)- 1])+';UID='+loginID+';PWD='+password+'', autocommit=True)
cursor = cnxn.cursor()
print('Successfully Connected!')
try:
while(1):
print('------------------------------------------------------')
print('Available Actions:')
print(' 1. List all Tables')
print(' 2. Execute SELECT Query')
print(' 3. Execute UPDATE/DELETE Query')
print(' 4. Exit')
action = raw_input('Select your action:')
if(action == '1'):
listTables(cursor)
elif(action == '2'):
executeSelectQuery(cursor, cnxn)
elif(action == '3'):
executeUpdateQuery(cursor, cnxn)
elif(action == '4'):
break
except:
print('------------------**********-----------------')
print('Exception Occured:' + str(sys.exc_info()[1][1]))
print('Exiting...')
sys.exit(0);
print('------------------**********-----------------')
if __name__ == '__main__':
dsn = show_odbc()
connect_odbc(dsn)
- Once you run the code, it will List all the DSN’s in the machine as shown below:

Selecting a DSN
- Once you select a DSN, you will be prompted for your DataDirect Cloud Username and Password:
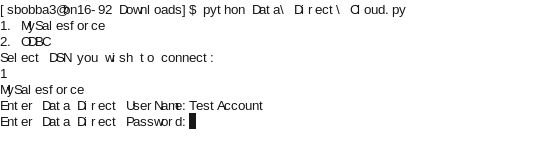
Provide DataDirect Cloud login details
- After you are authenticated, you will be shown the available actions and you can fetch/update data from your cloud data source. Figure below for reference:
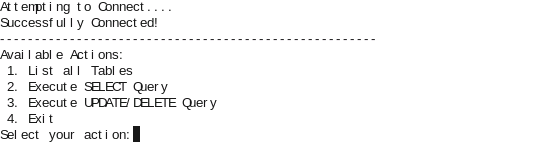
Choose an action once connected
- Once you select a DSN, you will be prompted for your DataDirect Cloud Username and Password:
The process for connecting in a Windows environment makes use of the ODBC Data Source Administrator GUI. Before you begin, make sure you have completed the steps in the “Getting Started” section above. After you’ve done that, proceed as follows:
- Install the DataDirect Cloud ODBC Drivers for Windows. This should have been done already in the “Getting Started” section.
- From the Start Menu, open the ODBC Administrator under Progress DataDirect Cloud ODBC Drivers Folder.
- Once the ODBC Administrator is open, click the User DSN tab, then click the button marked, “Add…”
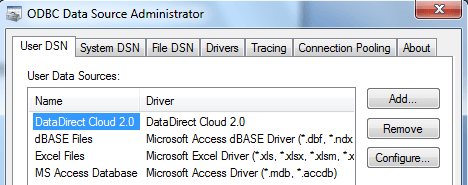
Click “Add” in the ODBC Data Source Administrator
- A new window will appear titled, “Create New Data Source.” Select “DataDirect Cloud 2.0” and click “Finish.”
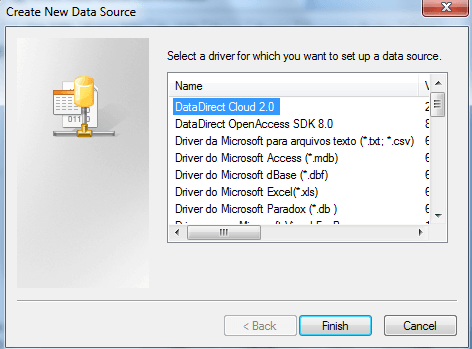
Create the new data source in the next window.
- Another window will appear letting you set up the driver. In the fields titled “Data Source Name” and “Database Name,” enter the Data Source Name you provided during the DataDirect Cloud setup. Click “Test Connect” to check if connection is successful.

Set up driver based on details from the DataDirect Cloud setup.
- Now you can run the Python code from the Linux section of this tutorial to fetch or update data from any cloud data source.
- A new window will appear titled, “Create New Data Source.” Select “DataDirect Cloud 2.0” and click “Finish.”
Though I chose to work in Python, similar steps can be followed with a language of your own choosing. Hopefully, this shows just how easy it is to establish a connection to any cloud data source using DataDirect Cloud and our ODBC/JDBC drivers.
Go ahead and grab a free trial of DataDirect Cloud and try it yourself! If you have any questions or run into any trouble, don’t hesitate to leave a comment below and we will help you out any way we can. Also, keep your eyes peeled for more posts from Saikrishna and myself, as we plan to share more exciting connectivity tricks in the future.
Author information

Senior Principal Systems Engineer, Progress DataDirect at Progress
Data Access Evangelist, Speaker and World's leading consultant on open data standards for cloud data.
Sumit Sarkar has been working in the data connectivity field for 10 years. His interests include performance tuning of the data access layer for which he has developed a patent pending technology for its analysis; business intelligence and data warehousing for SaaS platforms; and data connectivity for aPaaS environments - with a focus on standards such as ODBC, JDBC, ADO.NET, and ODATA.
He is an IBM Certified Consultant for IBM Cognos Business Intelligence and TDWI member.
He has presented sessions on data connectivity at various conferences including IUC34, IUC35, Progress Revolution, Oracle User's Group, Collaborate 12, Dreamforce 2012, Cloud Computing Expo 2012, PRGS13 Exchange, Dreamforce 2013, Oracle OpenWorld 14, PRGS14, DF14
Presented related webinars in collaboration with IOUG, DZone, Progress DataDirect and Progress Communities.
| Twitter | Google+ | LinkedIn |
The post Python Connectivity to Salesforce, Eloqua or Google appeared first on Progress Newsroom.
Continue reading...